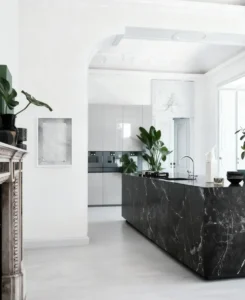
There is something about stepping onto cool marble tiles first thing in the morning. It feels solid. Timeless. Almost like the bathroom itself has a quiet dignity. But ask anyone who has lived with marble for more than six months, and they will tell you—it is not a “set it and forget it” kind of surface. Marble demands attention. Not the anxious kind, necessarily, but the observant kind. A little patience, a few smart habits, and knowing what not to do makes all the difference. So here is an honest, practical guide to keeping marble for bathroom surfaces looking like they should—beautiful, lived-in, but far from ruined.

Why Marble Needs a Different Kind of Attention
Marble is mostly calcium carbonate. That sounds technical, but what it really means is that it reacts to acids the way baking soda reacts to vinegar—just slower, and permanently. A drop of lemon juice, a splash of shampoo, even certain “natural” bathroom cleaners can leave a dull ring on a polished surface. That is not a stain. That is etching. The stone itself has been microscopically dissolved.
And here is something most guides gloss over: sealers do not prevent etching. They help with stains—liquids soaking in—but acids attack the surface directly, not through pores. Sealers are still important, just for a different reason. That distinction matters more than people realize.
So marble in a bathroom requires a bit of a mindset shift. It is not fragile exactly. It is just… particular. And once that is understood, caring for it becomes much less stressful.
Daily and Weekly Cleaning Routine for Marble in Bathroom
Let us start simple. A bathroom vanity gets splashed. A shower floor gets soap scum. A countertop collects toothpaste dots and hairspray mist. None of this has to be a disaster if the cleaning routine is consistent.
For daily upkeep:
- Wipe surfaces with a clean, damp microfiber cloth—warm water only, or a few drops of mild dish soap mixed in. No scrubbing. Just gentle wiping to lift dust, soap residue, and product mist.
- Dry immediately with a second soft cloth. Water left to evaporate on its own leaves mineral deposits that can look like stains over time.
- In the shower, keep a squeegee on the wall. A quick pass after each use cuts down on water spots and soap film dramatically.
For a deeper weekly clean:
Use a pH-neutral cleaner specifically formulated for natural stone. Dilute as directed—typically around 1:50 with warm water. Apply to small sections, let it sit for a minute or two to loosen residues, then wipe with a soft mop or cloth. Rinse with clean water and buff dry.
What to avoid? Vinegar. Bleach. Ammonia. Lemon juice. Any cleaner that says “removes hard water deposits” or “antibacterial” without explicitly stating it is safe for marble. These products will etch the surface, sometimes after a single use.
A quick reference table:
| Cleaning Task | What to Use | What to Absolutely Avoid |
|---|---|---|
| Daily wipe-down | Damp microfiber cloth; warm water only | Dry dusting (causes micro-scratches) |
| Weekly deep clean | pH-neutral stone cleaner (1:50 dilution) | Vinegar, bleach, ammonia, lemon juice |
| Shower wall after use | Squeegee | Abrasive sponges or scrub brushes |
| Stain spot treatment | Baking soda poultice (paste + plastic wrap) | Scrubbing or using acidic spot removers |
| Sealing | Penetrating impregnating sealer | “Wet look” acrylic sealers (they trap moisture) |
That daily routine is simple enough. But here is the thing: no amount of careful wiping will change whether marble is actually right for a specific bathroom. Before diving into stain removal and etching fixes, it is worth stepping back. For a full, honest look at the pros, cons, costs, and design considerations, the earlier guide Marble for Bathroom: Is It Good? covers everything from slip resistance to resale value.
Now, with that foundation in mind, let us talk about what to do when something goes wrong—because it will, eventually.
What to Do When Something Goes Wrong
Accidents happen. A bottle of foundation tips over. A guest leaves a wet lemon slice on the counter. A child’s toothpaste cap gets left open. Here is the honest reality: not every mark is permanent, but how one responds in the first few minutes matters enormously.
Spills and Stains
For any liquid—especially something colored like red wine, coffee, or hair dye—blot immediately. Never wipe. Wiping spreads the substance into a larger area. A clean paper towel or soft cloth pressed gently onto the spot absorbs most of it before it can seep in.
For stubborn stains that have already set, a poultice is the answer. Mix baking soda with water to form a thick paste—about the consistency of peanut butter. Spread it over the stain, extending slightly beyond its edges. Cover with plastic wrap, tape the edges loosely, and leave for 12 to 24 hours. The paste draws the stain out of the stone. Remove, rinse, and dry.
Different stains may require slightly different poultice recipes. Oil-based marks (cosmetics, lotions) sometimes respond better to baking soda mixed with a small amount of acetone. Rust stains may need hydrogen peroxide instead of water.
But for most bathroom spills—toothpaste, soap scum, shampoo—the basic baking soda and water method works well.
Etch Marks
Etching looks like a dull, slightly rough patch where the shine used to be. It is not a stain. No amount of scrubbing will remove it because the stone itself has been altered.
For light etches on polished marble, a marble polishing powder can help. Sprinkle a small amount onto the dull area, mist lightly with water, and buff in circular motions with a soft cloth. Rinse and dry. The gloss may not return entirely to factory perfection, but it often improves enough to be barely noticeable.
Deep etches or widespread dullness? That is usually a job for a professional stone restorer. Trying to fix a large etched area with DIY methods often makes it uneven.
Yellowing and Discoloration
Sometimes white marble develops yellowish patches, especially in showers. This can happen for a few reasons. One common culprit: grey thinset or grey cement used during installation. Moisture migrates through the stone, activates particles in the cement, and causes a chemical reaction that shows up as yellowing.
If the marble is already installed, removing yellowing is tricky. A hydrogen peroxide poultice may lighten it, but the stains often return because the underlying cause—moisture interacting with the installation materials—cannot be reversed without removing the stone. Prevention, in this case, is everything: white thinset only, and ideally a waterproof membrane system beneath the marble.
Another cause is simply hard water. Mineral deposits build up over time and can darken or discolor the surface. Using soft water for cleaning and drying thoroughly after each use helps significantly.

Sealing: When, Why, and How Often
Sealers do not make marble invincible. But they do buy time. A good penetrating sealer fills the microscopic pores of the stone, slowing down liquid absorption. Instead of a spill soaking in within seconds, it beads up and can be wiped away before it becomes a stain.
Here is a simple test to know if marble needs resealing: place a teaspoon of water on a clean, dry area. If the water darkens the stone or gets absorbed within one to two minutes, it is time to seal.
Frequency depends on use:
- Vanity tops and low-traffic areas: every 12 months
- Shower floors and high-moisture zones: every 6 to 9 months
- Wall cladding that sees little water: every 18 to 24 months
Application is straightforward: clean the surface thoroughly, let it dry completely (overnight if possible), apply the sealer evenly with a soft pad, let it penetrate per the instructions, then wipe off all excess before it dries. A second coat may be needed in areas that absorbed quickly.
Skip topical “wet look” acrylic sealers. They eventually peel and trap moisture underneath, causing more problems than they solve.
A Few Thoughts on Different Marble Types
Not all marble behaves identically. Some varieties are denser, some more porous, some more forgiving in a wet environment.
For those who want marble but feel uncertain about maintenance, darker options like Grigio Carnico Marble tend to hide minor etching and water spots better than white marbles. The fine white and grey veining also helps camouflage everyday wear.
Digarl Grey Marble offers a similarly practical balance—sophisticated grey tones that do not show every drop of water or every soap smudge. That is not a reason to neglect cleaning, of course, but it does make daily life a little less stressful.
For those committed to the classic white Carrara look, just know that it will show more. Every ring. Every spot. That is not a flaw. It is the nature of the stone. Some people genuinely love that patina of real use. Others find it frustrating. Neither perspective is wrong—just different expectations.
And for anyone still undecided about marble altogether, browsing through marble for bathroom options across different colors and finishes can help clarify what might actually work in a specific home.
FAQ
Does using a steam cleaner damage marble bathroom surfaces?
Yes—steam cleaners are not recommended for marble. The high heat and moisture can penetrate the stone, potentially causing discoloration, weakening the structure near edges, and damaging the grout. Steam also accelerates any chemical reactions already occurring within the stone, such as yellowing from iron content or cement residue. Stick to pH-neutral cleaners and soft cloths instead.
How do I remove soap scum buildup without etching the marble?
Standard soap scum removers are often too harsh for marble. Instead, use a dedicated stone-safe soap scum remover—look for products labeled specifically for natural stone. Alternatively, a mixture of warm water and a few drops of mild dish soap applied with a soft sponge, followed by thorough rinsing and drying, works for light to moderate buildup. For heavier deposits, a baking soda paste applied gently and rinsed immediately can help, but avoid letting it sit for extended periods.
Can I use marble in a bathroom with a steam shower?
Technically yes, but with significant caveats. Steam accelerates moisture penetration, which means sealing must be done more frequently—perhaps every three to four months. Steam also tends to react with any iron content in the stone, potentially causing yellowing in white marbles over time. Many designers recommend using marble on walls rather than floors in steam showers, and always with a honed (matte) finish rather than polished for better slip resistance. For the shower floor itself, some homeowners opt for a different material entirely while keeping marble on surrounding surfaces.